> ## Documentation Index
> Fetch the complete documentation index at: https://sequence-0fb8d9e6-api_docs.mintlify.site/llms.txt
> Use this file to discover all available pages before exploring further.
# Manage NFT Collections in Sequence Builder
> The Sequence Builder allows you to manage Collections of collectible metadata, including details, images, and properties. You can link Collections to deployable contracts for easy crafting flows. Control updates and public/private viewing of collection info on Sequence servers.
The Sequence Builder offers the ability to manage Collections of collectible metadata, including: collectible details, images, and properties. Within the Builder, Collections can be linked to deployable contracts from the Builder for easy crafting flows.
Media and metadata is saved to Sequence servers where certain functionality allows you to have control over updates and public or private viewing of your collection information.
[APIs](/api-references/metadata/overview) are also available to manage your NFT collection metadata.
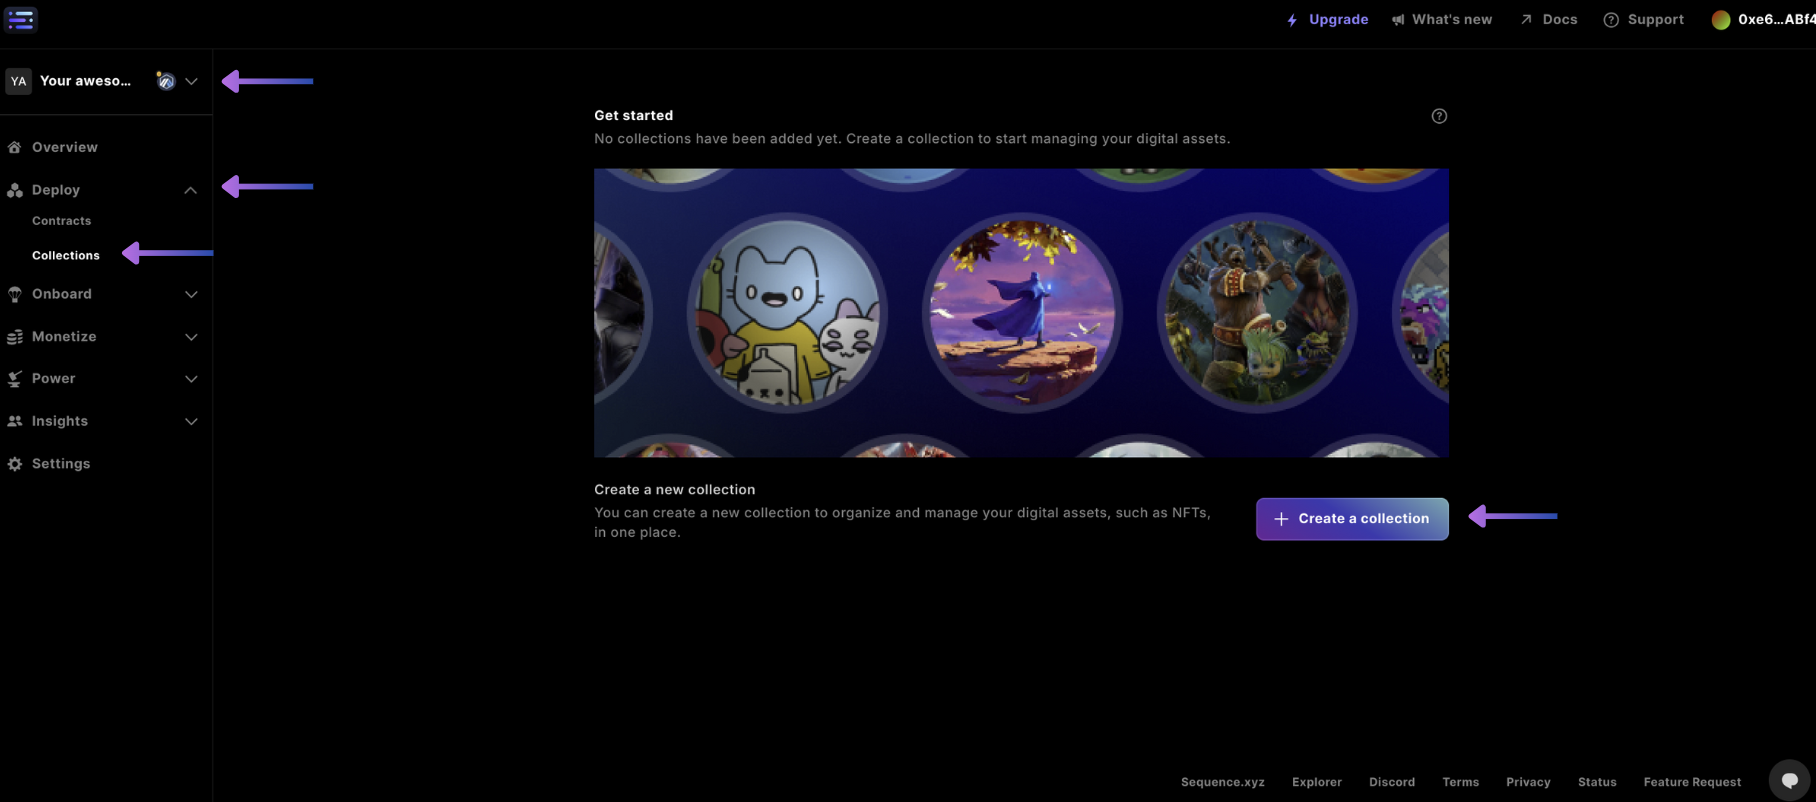
## 1. Create a Collection
First navigate to your project from the top left hand drop down of [Sequence Builder](https://sequence.build) and select the `Collections` page view from the left nav, then select the `+ Create a collection`
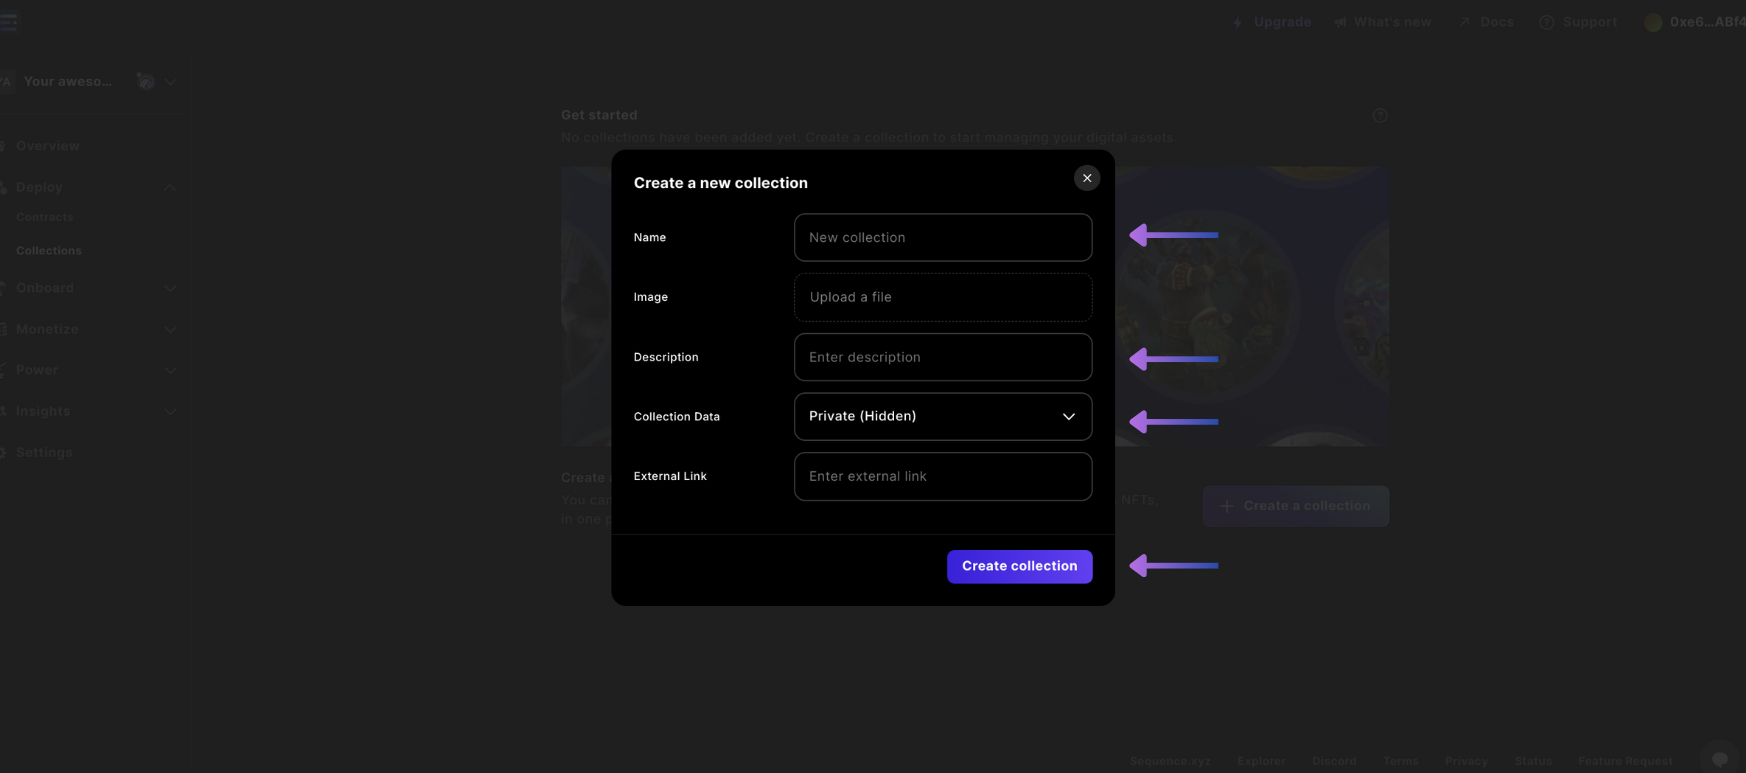
 Then input your details for the collection, like `Collection Name`, `Description` for the contract info, `Collection Data` being `Visible (Public)` or `Private (Hidden)` where for the data to be viewable select Visible (Public), and include your projects `External Link` to a website.
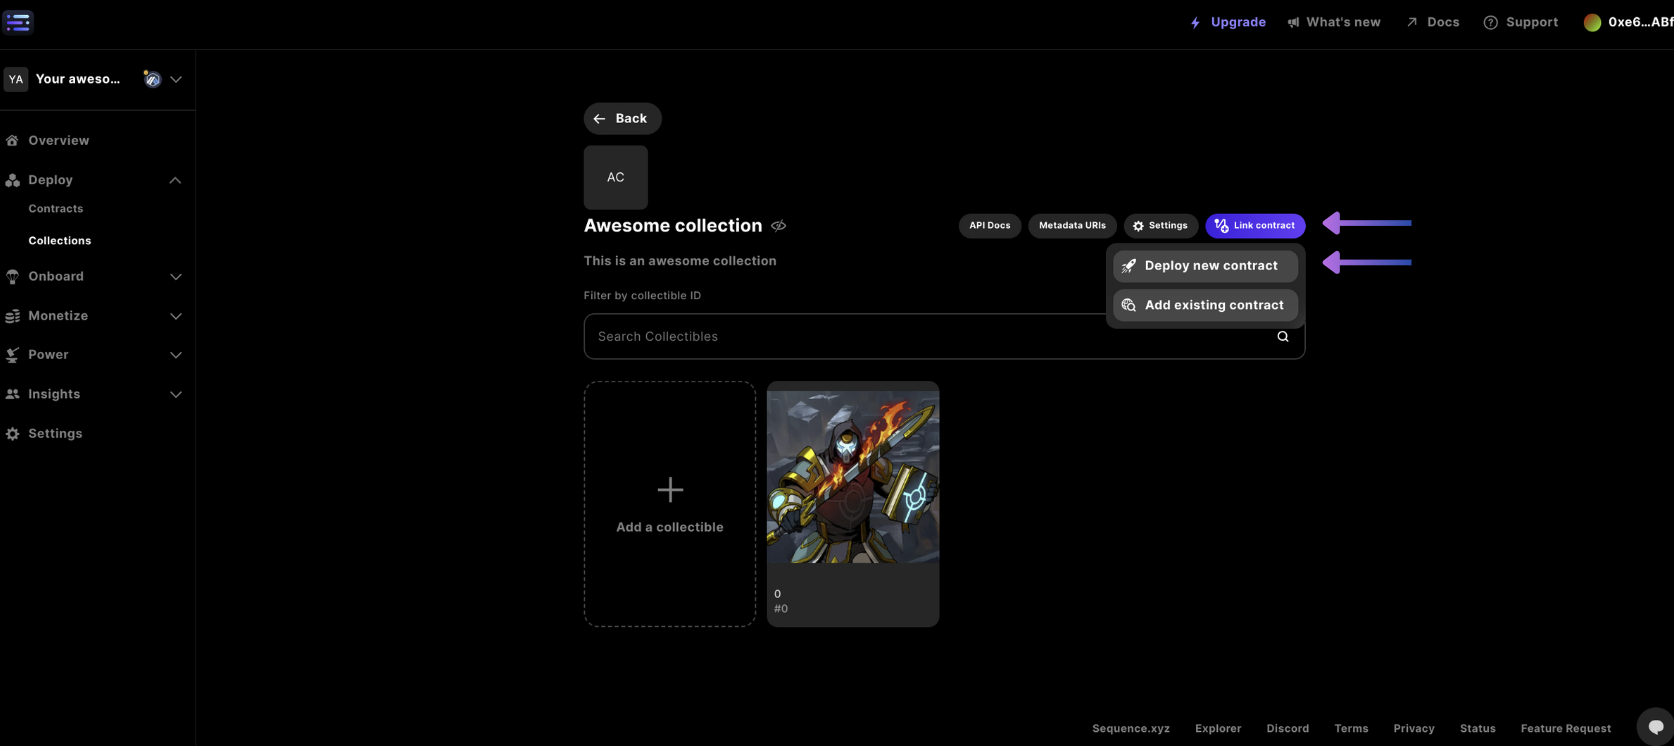
 ## 2. Link a Contract
After a collection has been created you can first link a contract by deploying a collectible contract (i.e. `ERC1155` or `ERC721`) and having the `baseMetadataURI` being set on the deployment by selecting the `Link contract`
Then select the `Deploy new contract`
## 2. Link a Contract
After a collection has been created you can first link a contract by deploying a collectible contract (i.e. `ERC1155` or `ERC721`) and having the `baseMetadataURI` being set on the deployment by selecting the `Link contract`
Then select the `Deploy new contract`
 Select your contract type or upload your own
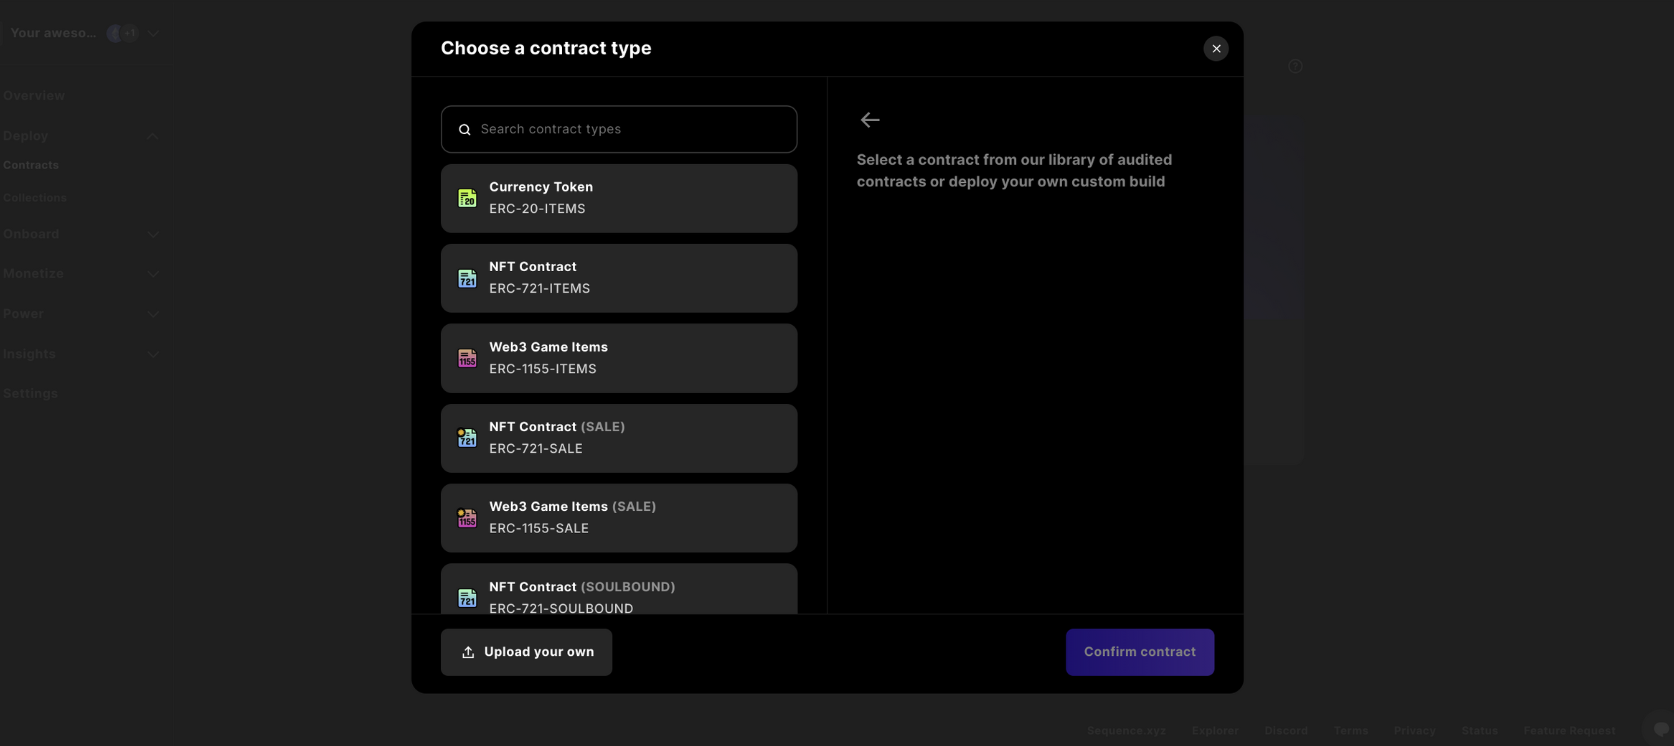 Next, you will be able to see the details of the contract type
 And complete your contract details, specifying the `Network`, `Contract Name`, and `Royalties`, whether to publish the Collectible on the [Token Directory](/api-references/indexer/examples/metadata-tips) and finally select `Deploy Contract` to then complete the transaction signing in the Sequence popup.
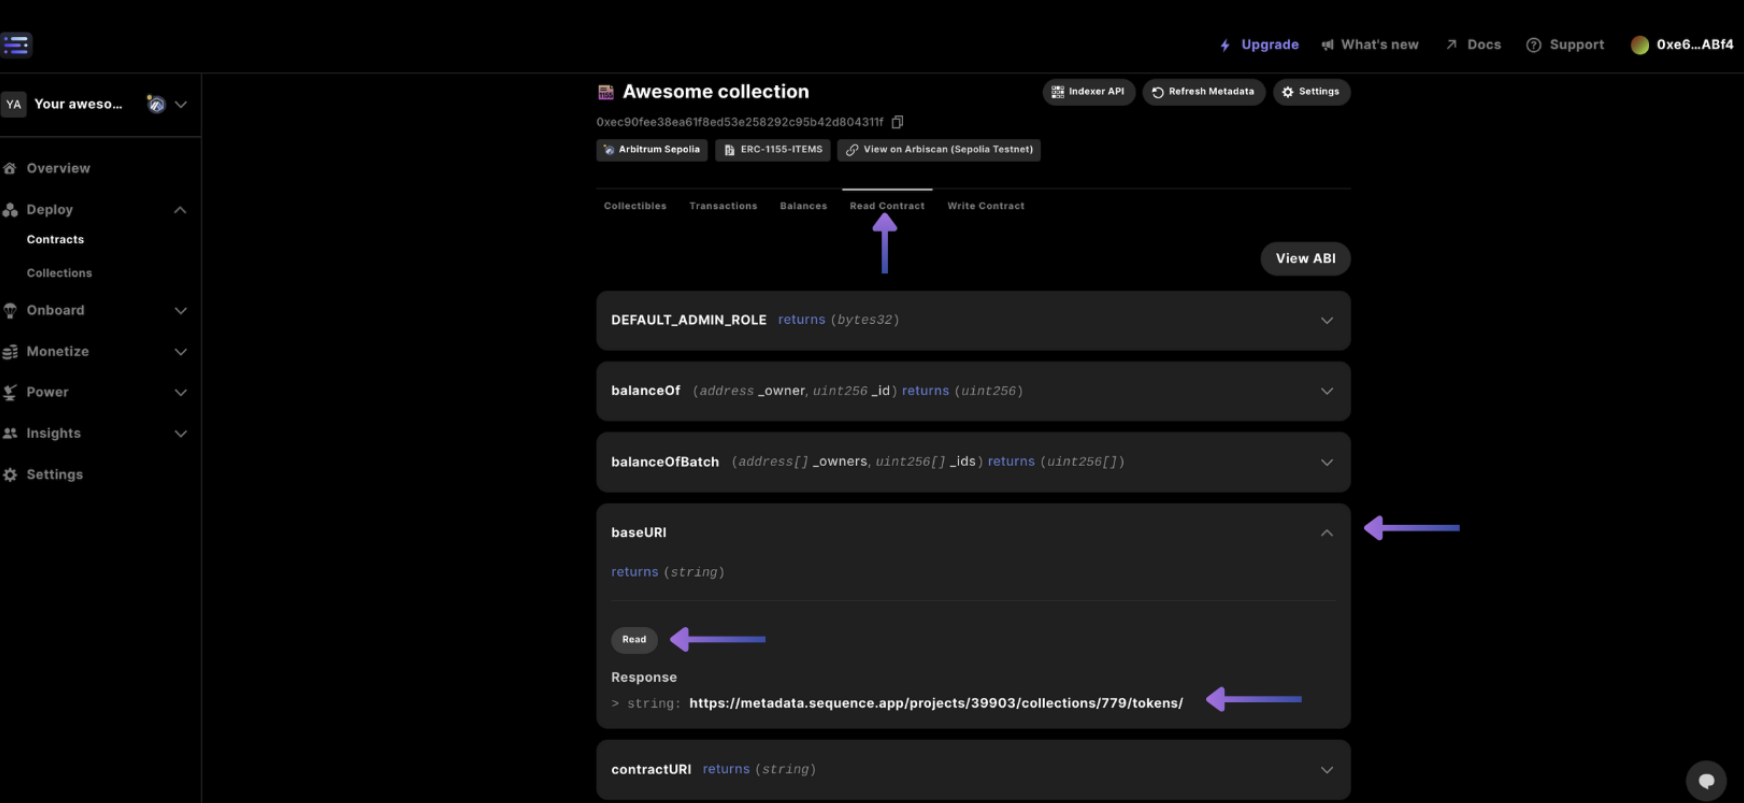
 Then you will notice if you check out the `Read Contract` section tab of the contract, if you `Read` from the `baseURI` it will show you the metadata url from Sequence where when read from the Indexer, `.json` will get appended to the end to reference the json for the collectible.
 ## 3. Create a Collectible
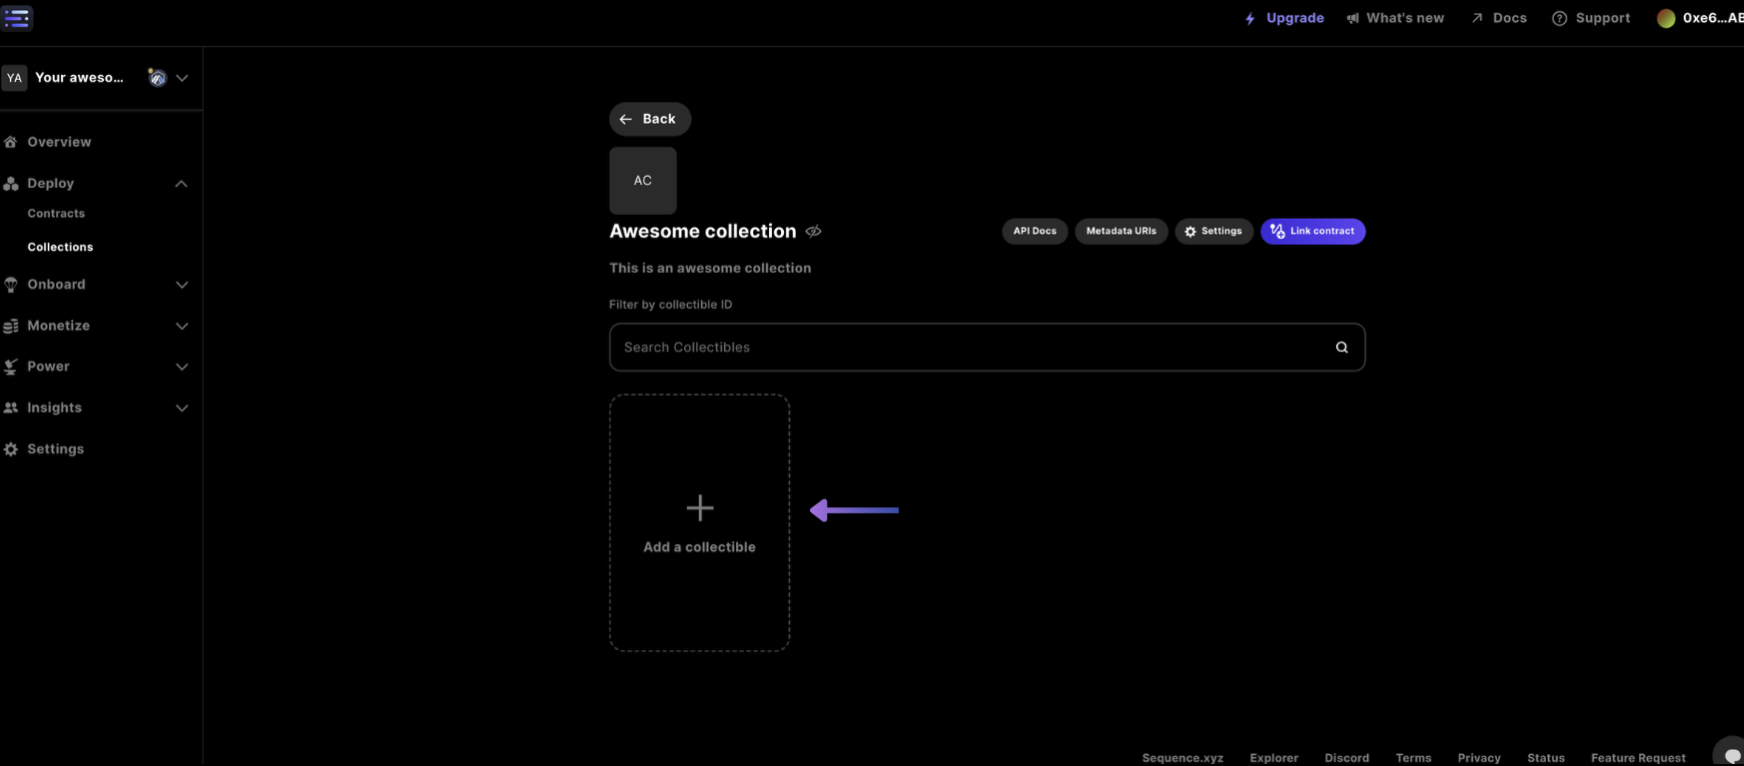
In order to create a Collectible as part of the Collection, return to the `Collections` page and select the `+ Add a collectible`
## 3. Create a Collectible
In order to create a Collectible as part of the Collection, return to the `Collections` page and select the `+ Add a collectible`
 Then update the details like `Collectible Name` and `Description`, then upload your artwork by selecting the greyish field
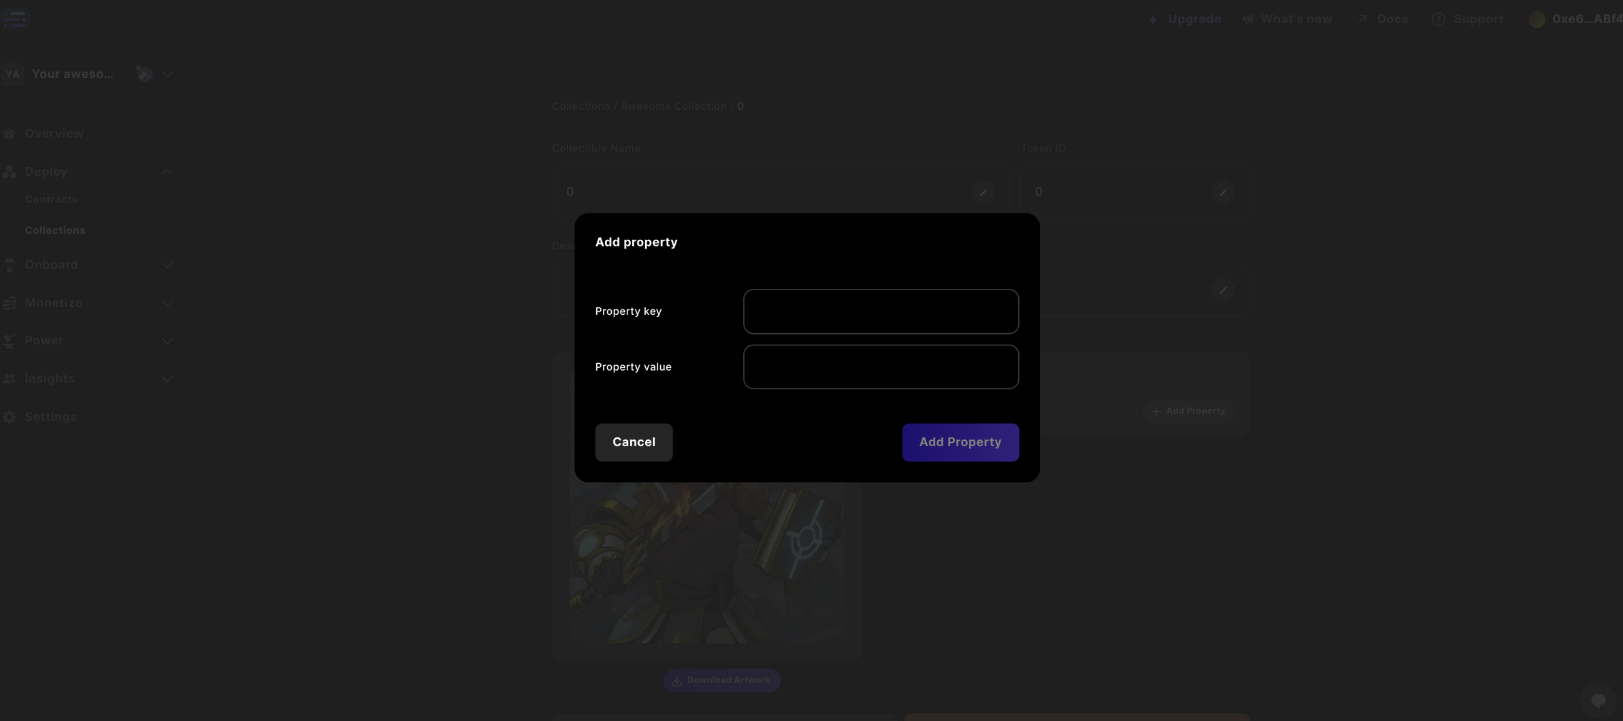
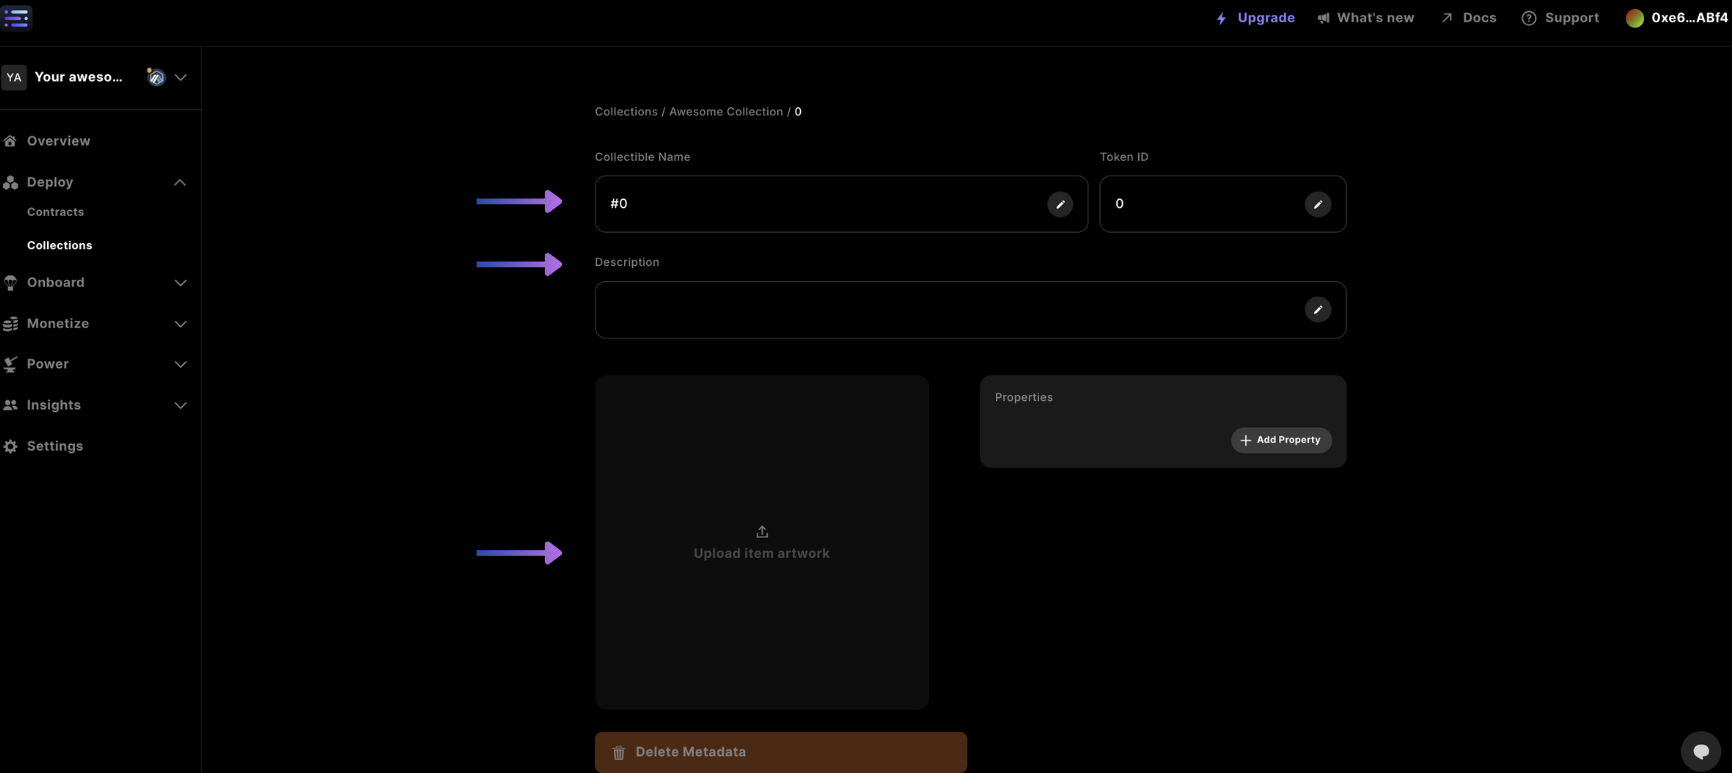 #### Add a metadata property
You can also add certain properties to your collectible, by selecting the `+ Add a property` which can be useful for inscribing more information like numbers or strings when using the metadata in any game.
#### Add a metadata property
You can also add certain properties to your collectible, by selecting the `+ Add a property` which can be useful for inscribing more information like numbers or strings when using the metadata in any game.
 Assigning the key and value to each property
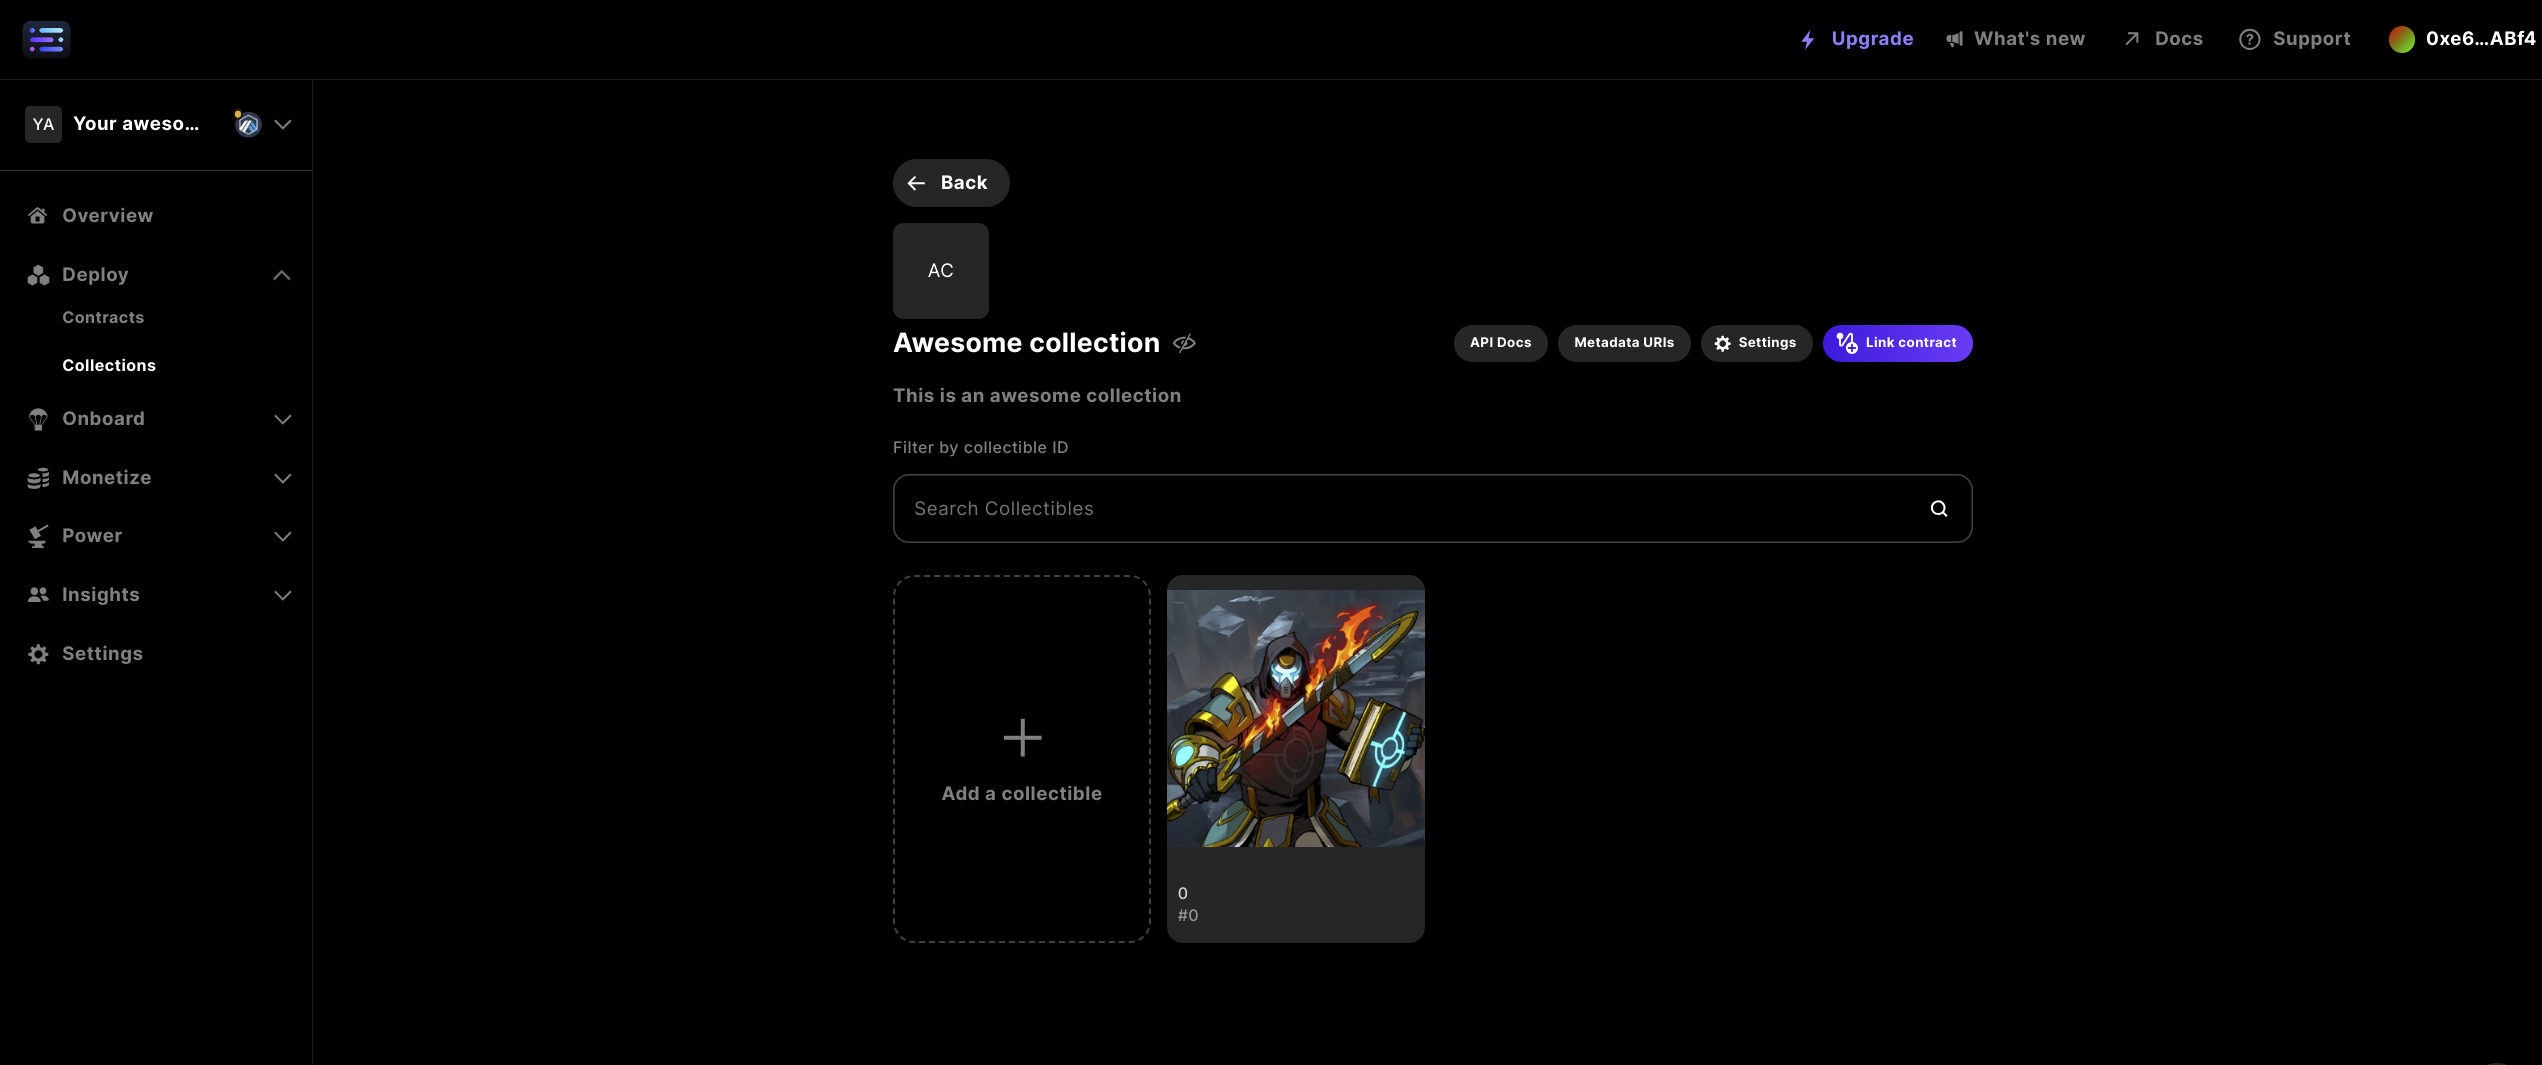
 Complete the prior steps until you get your final result of a collectible added to a collection
 ## 4. Update Info in Settings
At any point you can update the details for your collectible in the settings
## 4. Update Info in Settings
At any point you can update the details for your collectible in the settings
 Once in settings, you can update any one of the information fields, like: `Collection Name`, `Description`, visibility of `Collection data`, and an `External Link` to reference a website on the web.
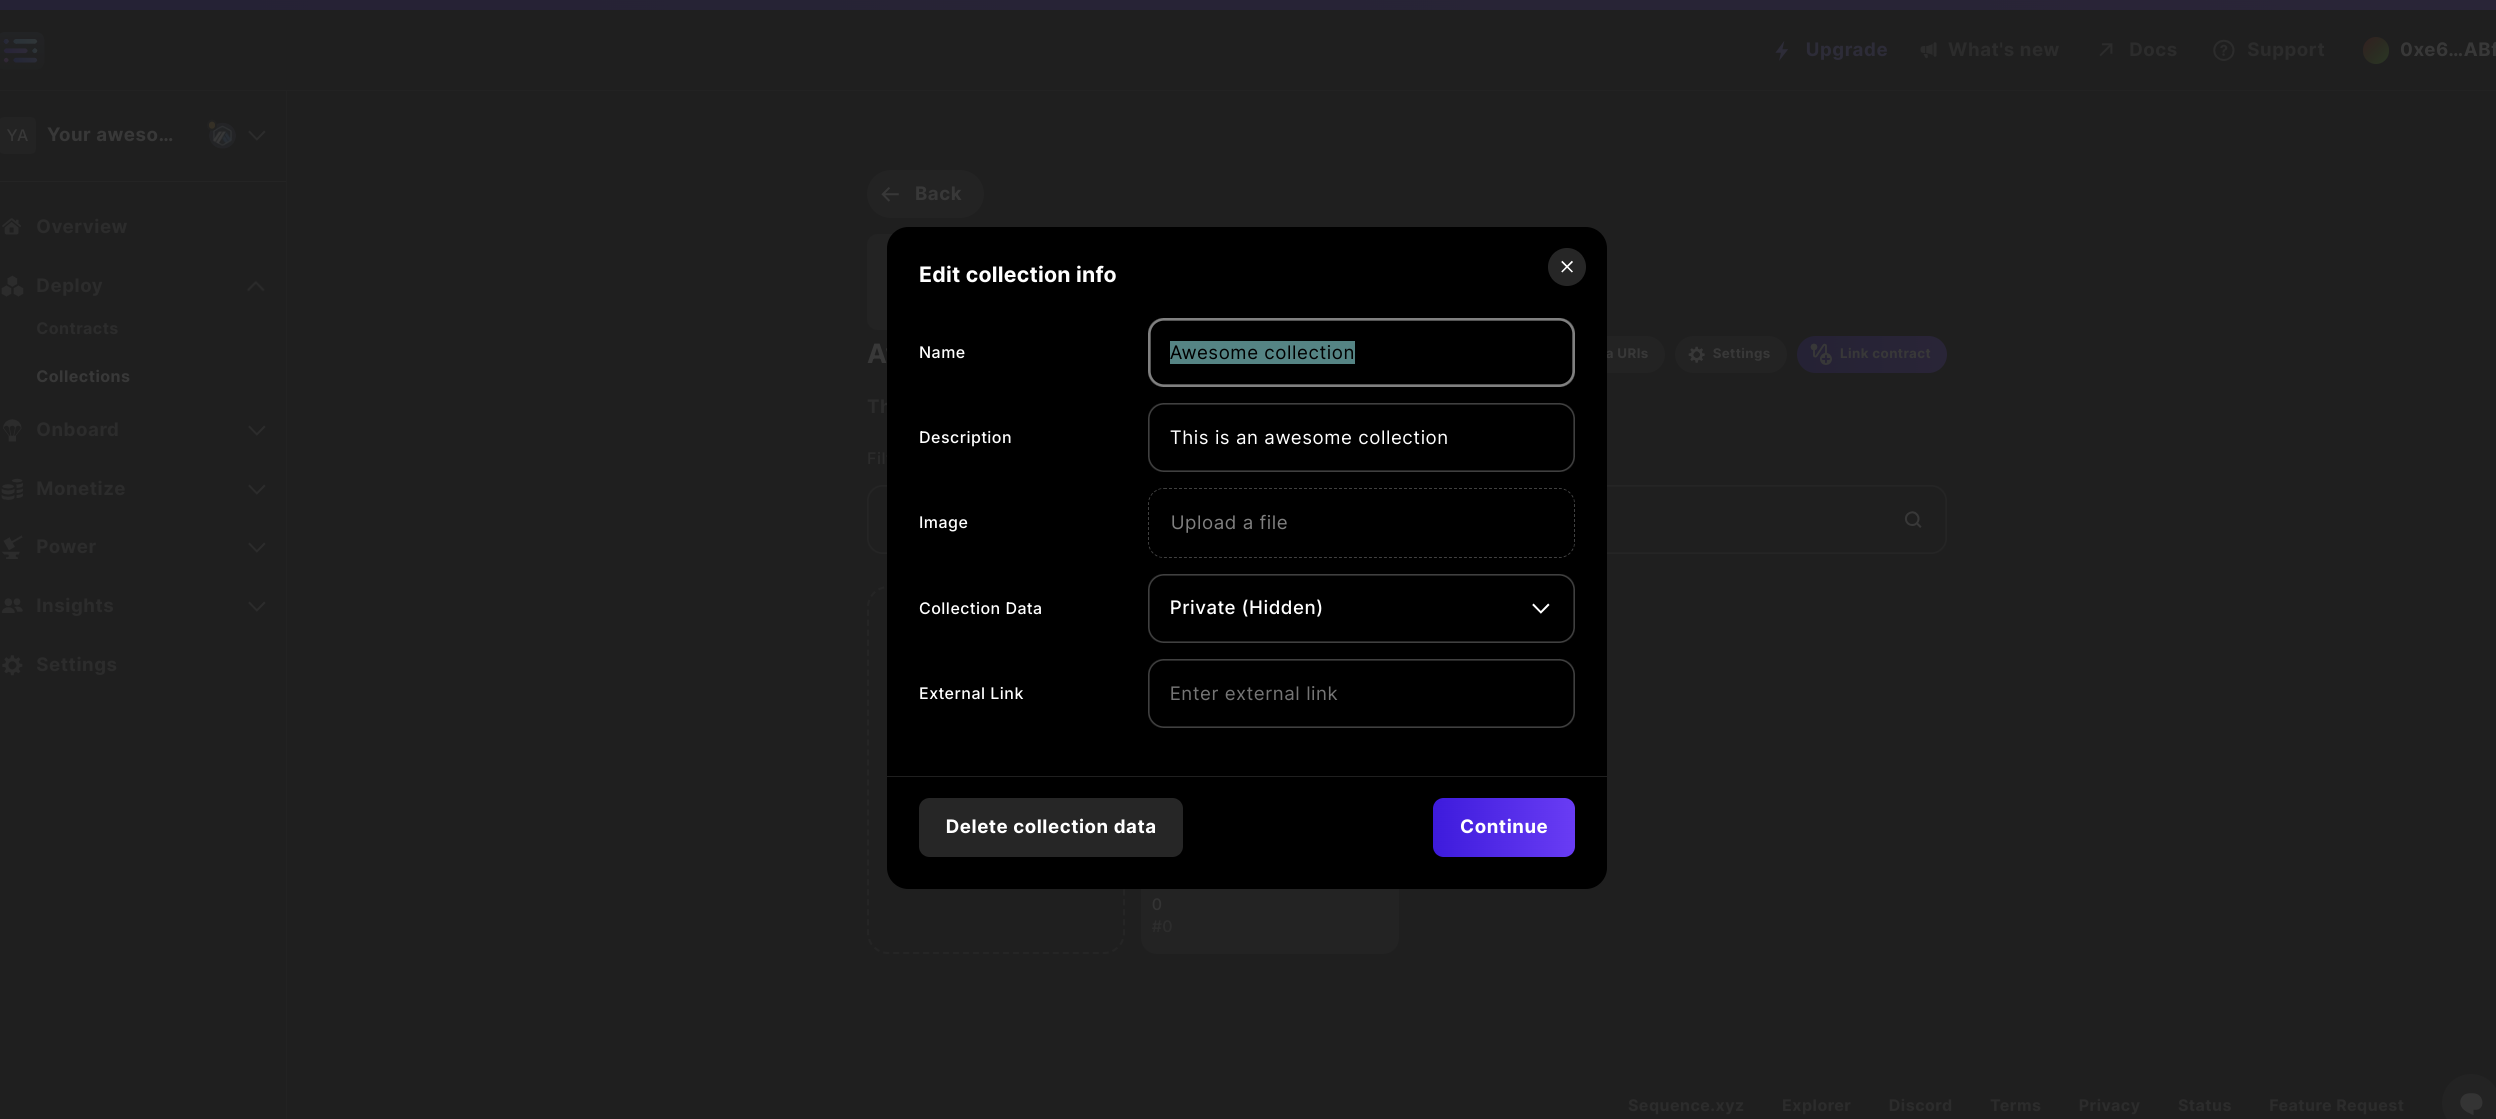 #### Delete Collection Data
You can delete all of the Collection data for the contract by selecting `Delete collection data` which will permanently delete data all data, an action that cannot be undone.
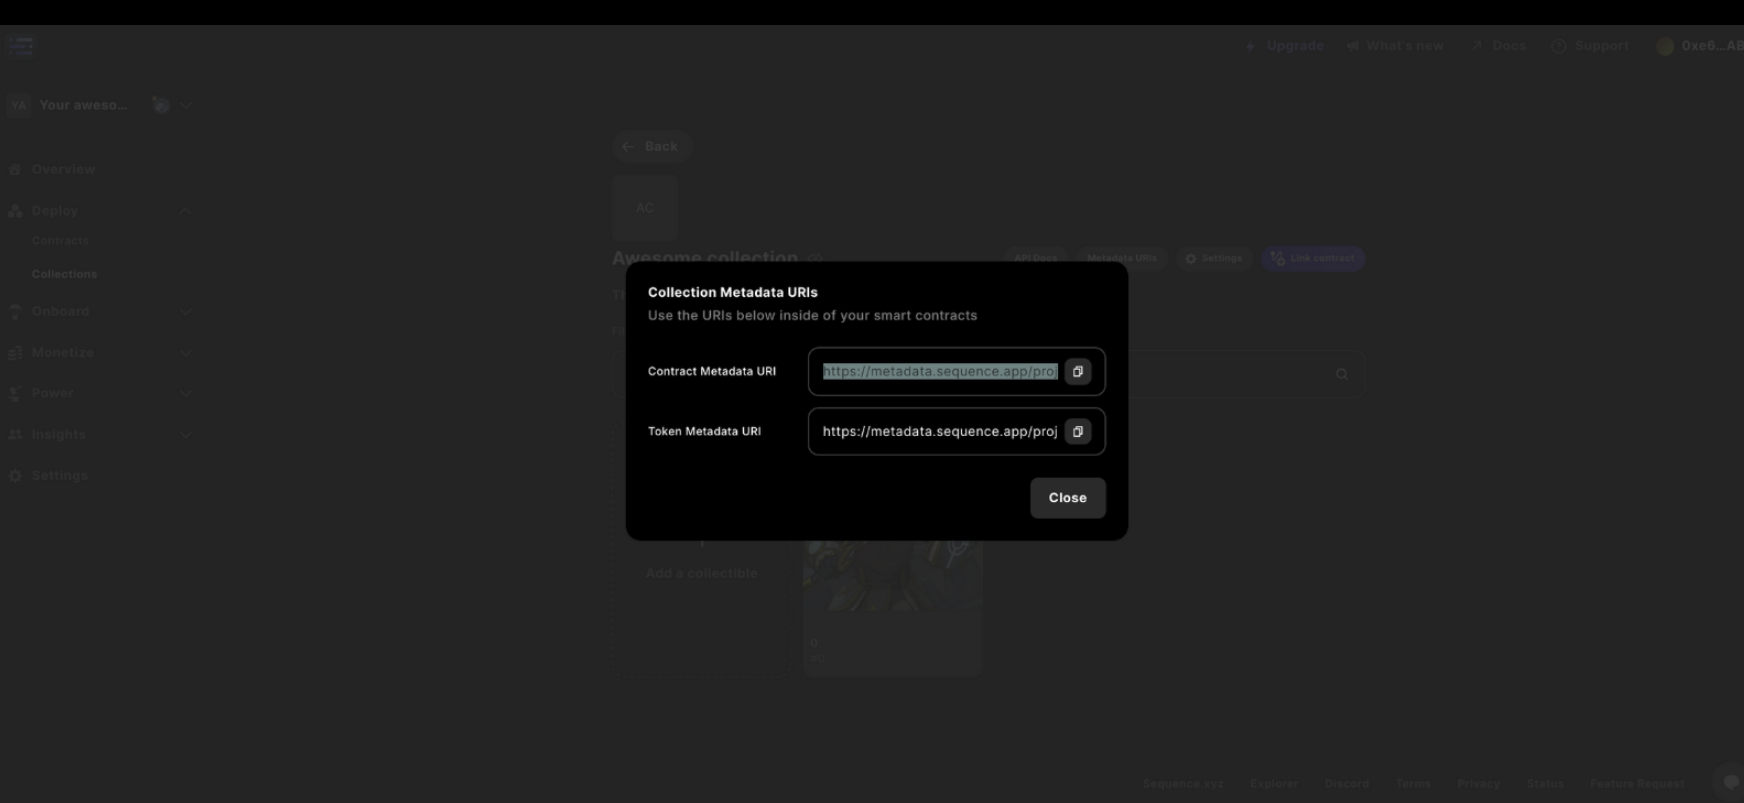
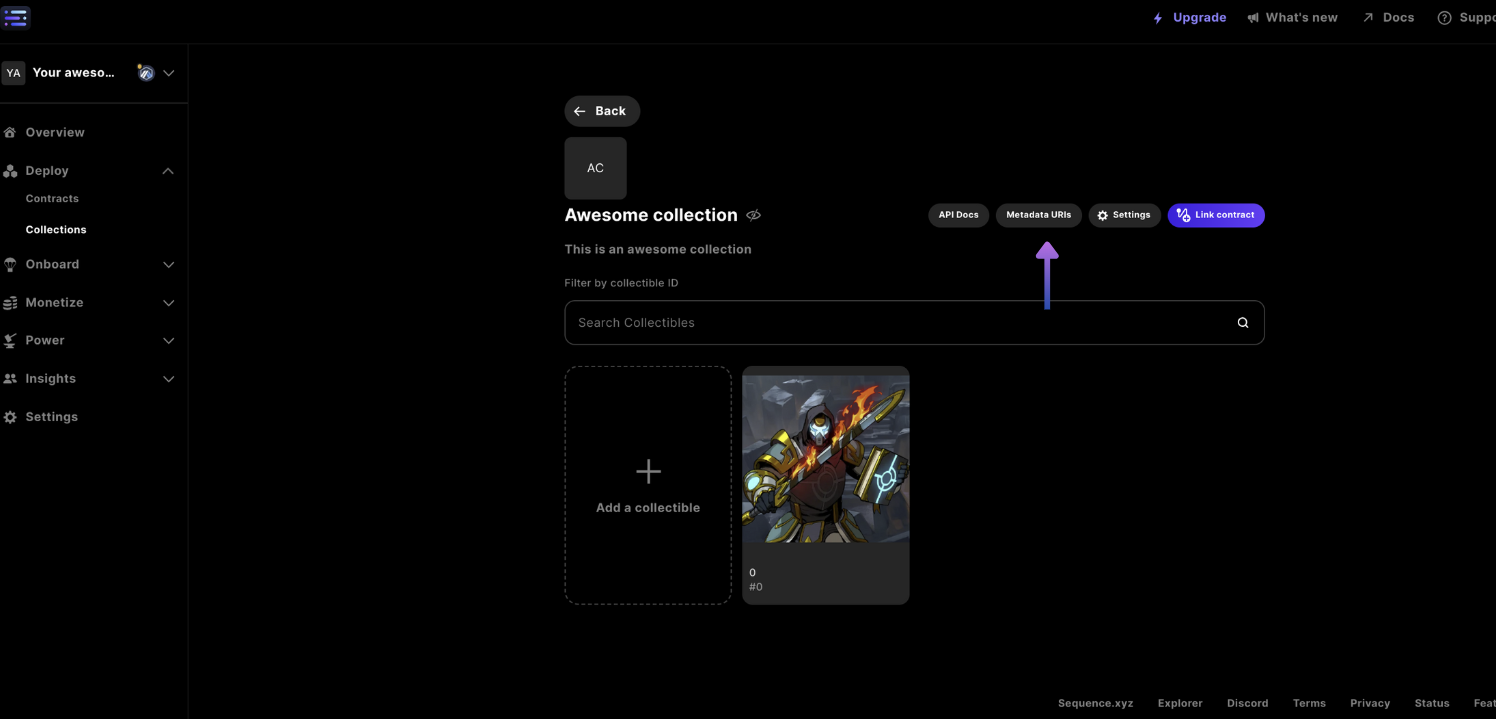
## 5. Reference Metadata Token URI
Currently in order to `Link Contract` you can't use predeployed contracts, but you can read the `Token Metadata URI` from the Collection to set your existing contracts' `setBaseMetadataURI`. The URI can be retrieved by accessing `Metadata URIs` button
#### Delete Collection Data
You can delete all of the Collection data for the contract by selecting `Delete collection data` which will permanently delete data all data, an action that cannot be undone.
## 5. Reference Metadata Token URI
Currently in order to `Link Contract` you can't use predeployed contracts, but you can read the `Token Metadata URI` from the Collection to set your existing contracts' `setBaseMetadataURI`. The URI can be retrieved by accessing `Metadata URIs` button
 Then copy the `Token Metadata URI` from the modal and use the URI to write to a contract with the `setBaseMetadataURI` function, or, use to reference metadata directly in an application by appending a `.json` to the URI to access the metadata